My 30 days of Thankful
Day 21
I am thankful for my Culinary Arts training. It makes preparation for big holiday meals less stressful. Proper preparation can prevent you from panicking the day of. Make any fillings the day before. Chop any vegetables. (minus onions as they absorb bacteria too fast once cut) Plan when you need to get each dish in the oven. Pre-steam veggies earlier in the day, then put in an ice bath to stop the cooking. Finish them in the oven after the turkey comes out. (while the turkey rests before carving. At least 30 minutes)
Showing posts with label Cooking. Show all posts
Showing posts with label Cooking. Show all posts
Wednesday, November 21, 2012


Monday, December 26, 2011
Ham and Beans
Christmas is over and now there is a fridge full of leftovers. What do you do with your ham bone and that big chunk of meat left on it unsliced?
One of my family's favorite meals comes from those leftovers. My husband actually asked for it on Easter instead of the spiral sliced ham. With a pregnant wife and 4 kids craving slow cooked spiral sliced ham, loaded baked potatoes, and steamed asparagus, corn and baby carrots he quickly backed down.
Ham and Beans
Left over Ham on bone from a spiral sliced ham
3 40oz cans of Pinto beans
1 Large yellow Onion small diced
Water
One of my family's favorite meals comes from those leftovers. My husband actually asked for it on Easter instead of the spiral sliced ham. With a pregnant wife and 4 kids craving slow cooked spiral sliced ham, loaded baked potatoes, and steamed asparagus, corn and baby carrots he quickly backed down.
Ham and Beans
Left over Ham on bone from a spiral sliced ham
3 40oz cans of Pinto beans
1 Large yellow Onion small diced
Water
- Start by adding the Ham with bone into a large pot.
- Drain the pinto beans and add to the pot.
- Add enough water to cover the ham and beans well.
- Add the diced onion into the pot as well.
- Put mixture onto medium heat let simmer until remaining meat falls off the ham bone.
- Remove the ham bone and chop up any large chunks of ham to large bite size pieces, returning the meat to the bean mixture.
- Turn heat to Medium high to thicken the liquids.
You can use Lima beans, Great Northern, or black eyed peas. Which ever bean your family prefers.
Wednesday, December 14, 2011
Happy Birthday to ME! Incredibly Easy Cake
Happy Birthday to ME!!
Yes, even though I'm 30-something-ish ::mumbles:: I still celebrate my birthday with great enjoyment. This recipe is one of a few others in the running that I might make with my kid's for my birthday. I'll share the cake with them , but they don't get any of my birthday cheesecake.
This recipe was originally brought to my attention by the Disheveled Mommy. I fell in love while pregnant and craving all things baked with pumpkin. Sadly my store shelves were lacking canned pumpkin and even fresh whole pumpkins until recently. I instead settled for the Applesauce and Cake mix version. (delicious but did not satisfy my craving at the time) Here is that original cake.
The Cake Mix and Canned Pumpkin Recipe originally from the Hungry Girl
 |
| Seriously, that's all the ingredients! |
18.25 oz box Moist-Style cake mix. (I used carrot cake since my store had no spice cake.. shh don't tell the kids)
One 15 oz. can pumpkin puree (not the pumpkin pie mix..)
One Can of Frosting
Directions:
- Preheat the oven to 400 degrees
- Prepare a pan with non-stick cooking spray.
- Combine the ingredients in a large bowl and mix thoroughly. (batter will be thick like brownie batter)
- Smooth batter into prepared pan and bake in the oven according to the direction on the box.
 |
| Thick Batter (you can add 1/2 cup water, but cake will be less dense) |
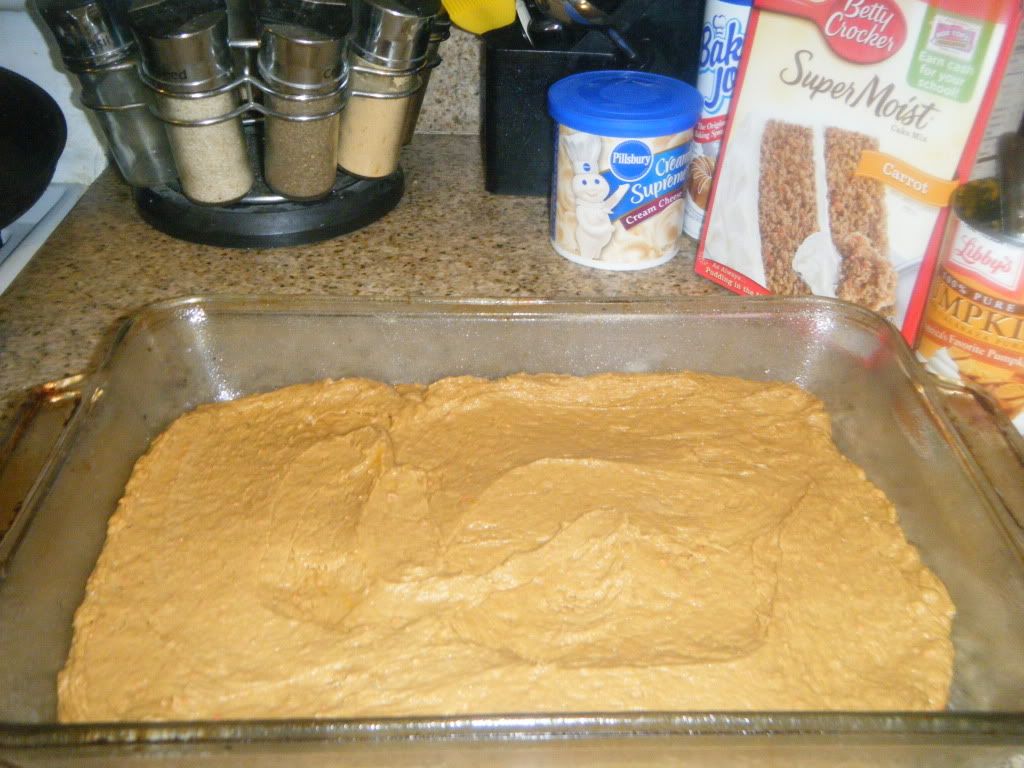 |
| Ready to bake |
Pull up a chair and watch it bake like my son does. or I guess you can go wash the dishes...
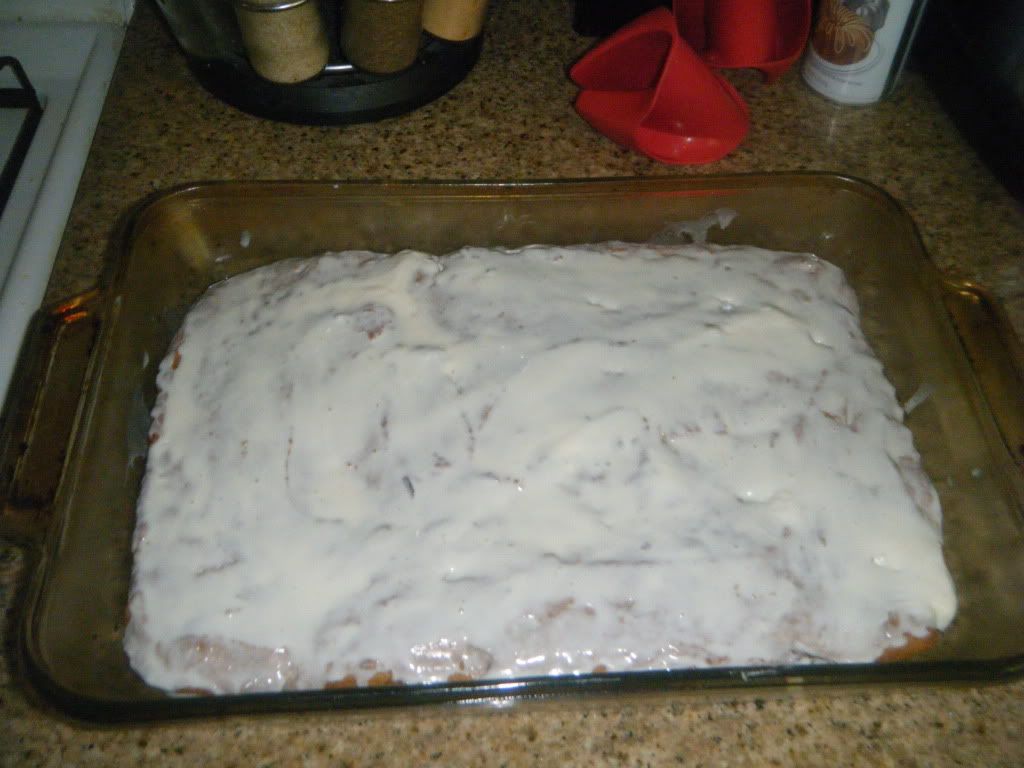 |
| I like topping the cake with a little bit of the cream cheese frosting while still slightly warm so the frosting melts into the cake making it extra delicious. |
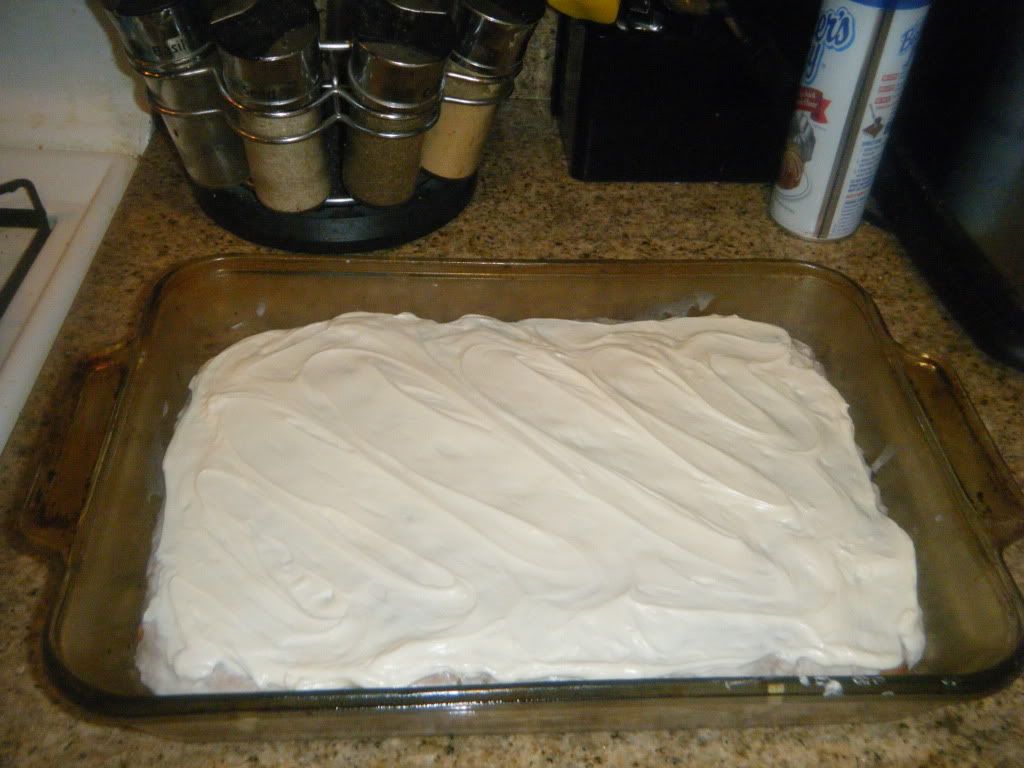 |
| Then let it cool and finish frosting it. |
And finally the best part!
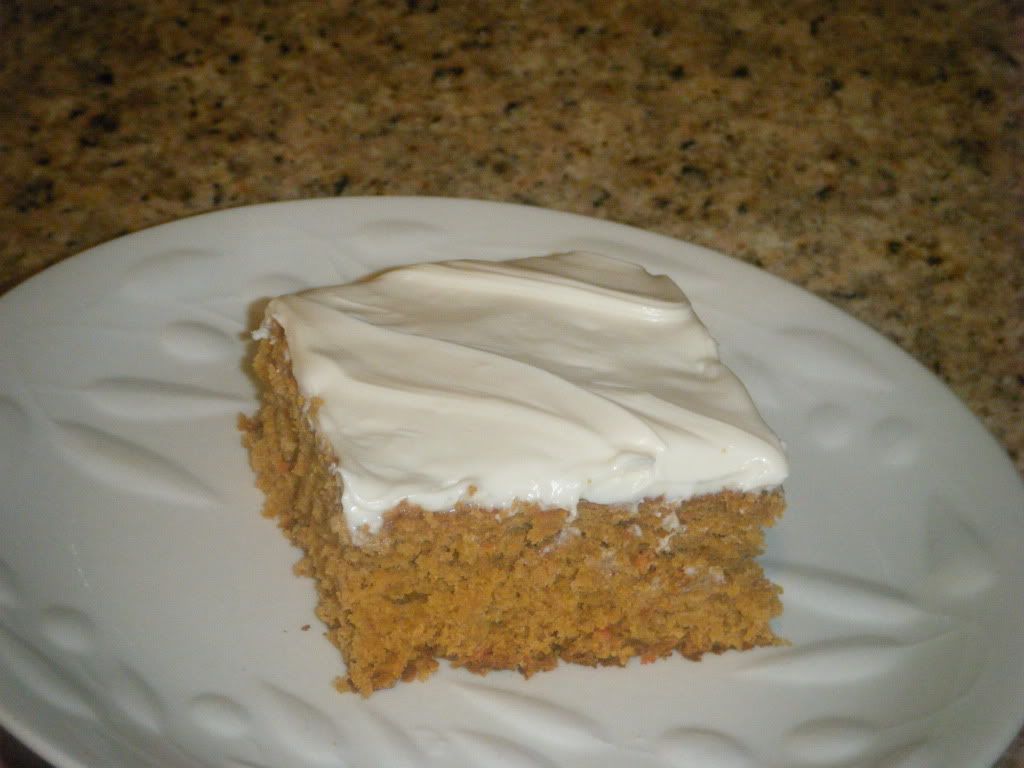 |
| The first slice.. mmm |
Wednesday, November 24, 2010
Some Sanity in the Madness
It's that time again this year. Time to start your OVENS!! Sorry, had to get that out of my system. Every year I go baking mad and it all starts with the baking marathon that is Thanksgiving. My very large family still gathers together every year even though we have all grown and had our own families. In this gorging spectacle my job has always been the pies. I love to bake, if you don't... tough cookies and nasty store bought brick cookies to you too. I'll add a few more tips for Thanksgiving to satisfying even the most baking challenged.
Even with all the dangers of stuffing turkeys people still enjoy doing it. Nothing like bonding over a family struck down with food poisoning. To be safer this holiday after draining the excess blood from the turkey heavily sprinkle kosher salt on the inside cavity of the turkey. Let sit for 5-10 minutes and rinse in cold water. The salt will draw the excess blood out of the cavity.
A good time saver is to cut all the vegetable for the hor'dourves tray the day before and just store the cut vegetables in an ice bath in the fridge. You can also cut the veggies in to decorative flowers if the mood strikes you. The easiest to make by far is a mum. Cut a criss-cross pattern (4 lines intersecting from 2 different sides in an X) into the top half of a radish and store in an ice bath for it to "bloom" open.
When making your apple pies this year for thanksgiving be sure you simmer the apples in a pan before baking in the pie shell. If you don't precook the apples you could end up with a large gap between the top crust and the apples.
A extra tip when making the pie dough crust use ICE cold water. It keeps the fat from blending easily with the flour. The less you blend the dough the flakier the crust. I prefer placing all my ingredients in the freezer after measuring out the dry ingredients (salt and flour) into a freezer bag. In a separate bowl cool the fats (butter or shortening). I cool all ingredients separately for 30 minutes before blending together as usual.
While baking your pies and the crust starts to darker long before the pie will be done. Make a ring around the outside edges of your pie with tinfoil.
To get that extra golden look to your crusts lightly brush the crusts with a egg wash. Sprinkle with sugar to give it extra crunch.
Egg wash for browning baked goods. 1 egg whipped with 1TB water. Brush on baked goods lightly to get a golden sheen. Then bake as usual. This will even work well on rolls.
Various Thanksgiving Tips
Even with all the dangers of stuffing turkeys people still enjoy doing it. Nothing like bonding over a family struck down with food poisoning. To be safer this holiday after draining the excess blood from the turkey heavily sprinkle kosher salt on the inside cavity of the turkey. Let sit for 5-10 minutes and rinse in cold water. The salt will draw the excess blood out of the cavity.
A good time saver is to cut all the vegetable for the hor'dourves tray the day before and just store the cut vegetables in an ice bath in the fridge. You can also cut the veggies in to decorative flowers if the mood strikes you. The easiest to make by far is a mum. Cut a criss-cross pattern (4 lines intersecting from 2 different sides in an X) into the top half of a radish and store in an ice bath for it to "bloom" open.
When making your apple pies this year for thanksgiving be sure you simmer the apples in a pan before baking in the pie shell. If you don't precook the apples you could end up with a large gap between the top crust and the apples.
A extra tip when making the pie dough crust use ICE cold water. It keeps the fat from blending easily with the flour. The less you blend the dough the flakier the crust. I prefer placing all my ingredients in the freezer after measuring out the dry ingredients (salt and flour) into a freezer bag. In a separate bowl cool the fats (butter or shortening). I cool all ingredients separately for 30 minutes before blending together as usual.
While baking your pies and the crust starts to darker long before the pie will be done. Make a ring around the outside edges of your pie with tinfoil.
To get that extra golden look to your crusts lightly brush the crusts with a egg wash. Sprinkle with sugar to give it extra crunch.
Egg wash for browning baked goods. 1 egg whipped with 1TB water. Brush on baked goods lightly to get a golden sheen. Then bake as usual. This will even work well on rolls.
Saturday, October 9, 2010
Caramel Popcorn Balls

Most the day on Friday I spent busily putting away my overly large collection of kitchen glassware and gadgets into this china hutch I recently received. It used to belong to my sister but she is moving out-of-state so I bought it from her. It needs some new hardware, but that will be an easy fix. I really needed the extra storage. My kitchen storage was bursting at the seams, all due to my addiction for all things cool looking and cooking related.
I'm excited by just how much counter top I freed up by storing my occasional use appliances in the bottom of the hutch. I can't wait to make a Lattice-top Apple pie in my kitchen now. Or maybe some Italian Pastry cookies. Oh, the ideas I have for my kitchen this upcoming holiday season. I even grabbed my rolling-pin and mimed rolling out some dough.
With all the ideas of baking possibilities swirling through my mind it really got me into the spirit of fall so, I made some Popcorn balls for a special treat. They were surprisingly easy to make. More importantly the kids loved them.
Caramel Popcorn Balls
Yields about 6 popcorn balls
Ingredients
2 quarts popped popcorn or 1/3 cup popcorn kernels
1 cup packed brown sugar
1/3 cup water
1/3 cup dark corn syrup
1/4 cup butter (no substitutes)
1/2 teaspoon salt
1 teaspoon vanilla extract
Directions
- Pop the 1/3 cup of popcorn kernels using your preferred method. Put the popcorn in a large bowl and set aside.
- In a heavy saucepan, combine the brown sugar, water, corn syrup, butter and salt. Bring mixture to a boil over medium heat, stirring constantly.
- Continue cooking, without stirring , until a candy thermometer reads 270 degrees F (soft-crack stage).
- Remove from the heat; stir in vanilla. Pour over popcorn; stir until the popcorn is evenly coated. When cool enough to handle, quickly shape into balls.
- Let cool at room temperature.
Variation
This recipe also makes a great popcorn munch. To make this recipe as a popcorn munch reduce the amount of popped popcorn you use and add 1 cup of your favorite nuts. To cool, spread on waxed paper at room temperature. You can also drizzle with melted chocolate.
Tuesday, October 5, 2010
Boiled Eggs
Boiled Eggs
When boiling eggs and you notice a crack forming in the shell as it cooks, simply pull the egg out of the water with a slotted spoon and throughly coat the crack in salt. Let the salt sit for a minute then add the egg back to the boiling water. The salt will seal up most cracks that form after cooking has begun.
Or to prevent the cracks in the first place add a few Tablespoons of white vinegar to the water.
When making deviled eggs do not over crowd the pan. Leave room to stir the eggs around while cooking. If you gently stir the eggs while they cook the yolk with form in the center for an attractive uniform base for the deviled eggs.

When poaching eggs add a Tablespoon of white vinegar to the water and the eggs will stay formed better. Cook as usual.
Related Articles
- Super-quick Egg Shelling (quazen.com)
Monday, August 30, 2010
The Ultimate Chocolate Sauce
I was playing around with a recipe in my kitchen and came up with delicious chocolate sauce. I will never be buying another chocolate sauce from the store ever again. This was too cheap and easy to make to not use it. Depending on how long you cook the recipe will decide what type of sauce you make. I just may give this recipe in squeeze bottles and or little jars as part of a Christmas gift.
Ingredients
2/3 cup unsweetened cocoa
1 1/4 cups water
1 2/3 cups sugar
2 TBS corn syrup
1 tsp vanilla extract
Directions
Ultimate Chocolate Sauce
Ingredients
2/3 cup unsweetened cocoa
1 1/4 cups water
1 2/3 cups sugar
2 TBS corn syrup
1 tsp vanilla extract
Directions
- In a large saucepan over medium heat, combine cocoa sugar and water.
- Bring to a full boil and let boil (for 5 min to make your own version of Hershey's squeeze bottle chocolate) (for 15 minutes to make hot fudge ice cream topping) Stir constantly.
- Remove from heat and stir in Vanilla.
- Let sauce cool to thicken.
- Store in the refrigerator.
Sunday, August 29, 2010
Adding to the Joy of Baking
There are many things I can't live without bake without. The one thing most important to me for baking is my can of Baker's Joy cooking spray. I can't say enough about how much I love that baking spray. Even some of the stickiest and most troublesome recipes will always slide right out of the pan when using Baker's Joy. Unlike when you oil then flour dust a pan separately, when using Baker's joy it uses only a fine mist of oil and flour. Leaving much less chance for a simple mistake like too much or too little ruin your sweet treat.
My all time favorite packaged brownie mix is easily the Ghirardelli triple chocolate brownie. I buy mine in bulk at Sam's Club. 4 batches of this gooey brownie come in one box. When we eat the last batch it is truly a bittersweet day.
My favorite use for brownies if they make it beyond the warm gooey treat fresh from the oven is turning them into hot fudge brownie sundaes. Even with a lactose intolerant husband I can't live without my standard french vanilla ice cream to dress up with yummy treats like these brownies or even a favorite cookie. It is the one ice cream you can always count on in my freezer. Dress it up or mix something in, vanilla ice cream is a good base to start many delicious treats. French vanilla is even more yummy with its vanilla bean speckles and custard-like base.
Here is a delicious hot fudge sauce recipe.
Ingredients
Directions
Notes
May store in a glass jar in the refrigerator.
My all time favorite packaged brownie mix is easily the Ghirardelli triple chocolate brownie. I buy mine in bulk at Sam's Club. 4 batches of this gooey brownie come in one box. When we eat the last batch it is truly a bittersweet day.
My favorite use for brownies if they make it beyond the warm gooey treat fresh from the oven is turning them into hot fudge brownie sundaes. Even with a lactose intolerant husband I can't live without my standard french vanilla ice cream to dress up with yummy treats like these brownies or even a favorite cookie. It is the one ice cream you can always count on in my freezer. Dress it up or mix something in, vanilla ice cream is a good base to start many delicious treats. French vanilla is even more yummy with its vanilla bean speckles and custard-like base.
Here is a delicious hot fudge sauce recipe.
Hot Fudge Sauce
Ingredients
- 1 stick butter
- 4 ounces unsweetened chocolate
- 3 1/4 cup sugar
- 1 - 13 ounce can evaporated milk
Directions
- In top of a double boiler over hot water, melt butter and chocolate.
- Gradually add sugar and half the milk alternately.
- Stir well after each addition
- Add remaining milk, stirring constantly.
- Cook until mixture is thick and sugar dissolves.
Notes
May store in a glass jar in the refrigerator.
Subscribe to:
Posts (Atom)
Vote For Me


